
ACCESSING AND MANAGING LEADS
Exhibitors can generate qualified leads and monitor them through the exhibitor portal. If a MyPlanner user agrees to share their information during the planner signup process, their contact information (name, email, company, and title) will be shared with any exhibitors they add to their MyPlanner. Exhibitors can access this leads list at any time through their exhibitor portal and reach out to them to continue networking.
Directions for Accessing and Managing Leads
1.
Login to your exhibitor portal with your assigned credentials.
2. Click the “Leads” option in the Activity section at the top of the portal home page.
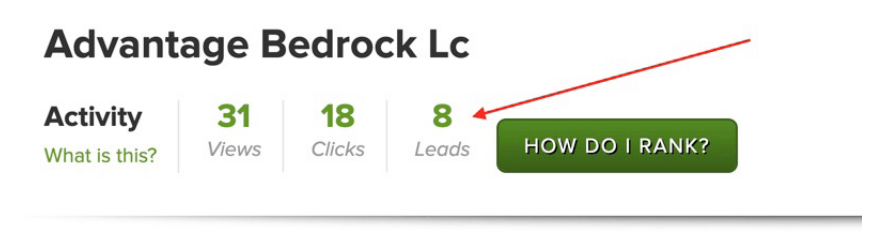
3. On this page you can view all users who have opted in to sharing their information. You will see their name, email, company/title, location (optional), and the date they addedyour company to their planner.

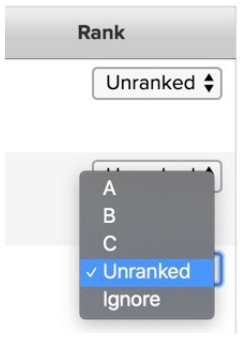
4. Use the “Rank” column to rank your leads by giving them a letter grade based on importance, or you can select the “Ignore” option. All leads will default to “Unranked” until you manually update them.
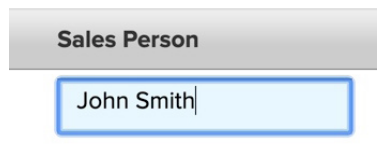
5. Use the “Sales Person” column to assign a sales person from your company to a lead. You can export this information within your leads list for internal reference.
6. Use the “Notes” icon to enter additional information about the lead or to track conversation details.

7. Filter your leads list by rank, status, or sales person using the options at the top of the page.

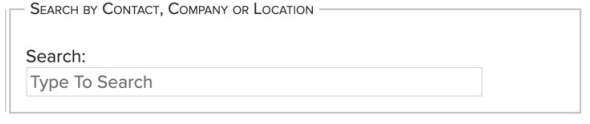
8. Use the search function to search your leads list by contact, company, or location.
9. You can export your full leads list to Excel by selecting the “Save data to an Excel spreadsheet” link.
